


How to Choose a Commercial Pizza Prep Table / Station: The Ultimate Guide
A commercial pizza prep station (often called a pizza prep table, make-up table, or pizza workbench) is the operational heart of any professional pizzeria. It's where dough is stretched, sauce is applied, and toppings are meticulously arranged. Choosing the right one directly impacts your kitchen's workflow, ingredient quality, and staff efficiency. This comprehensive guide will help you select the perfect pizza prep station for your operation.
1. Define Your Operational Scale and Needs
Start by analyzing your specific requirements:
- Volume & Throughput: Estimate your peak-hour pizza output. A high-volume restaurant needs a larger surface area and more ingredient wells than a casual café.
- Menu Complexity: How many topping varieties do you offer? A complex menu with 20+ toppings requires significantly more organized cold storage space than a simple 5-topping menu.
- Kitchen Layout & Staffing: How many pizzaioli will work simultaneously at the station? Ensure enough elbow room (typically 24-36 inches per person) to prevent bottlenecks.
- Dough Management: Do you need a built-in dough docker or dedicated space for dough balls? Some stations include a flour bin and cutter slot.
2. Understand Core Configurations and Components
Pizza prep stations come in integrated units or modular setups. Key components include:
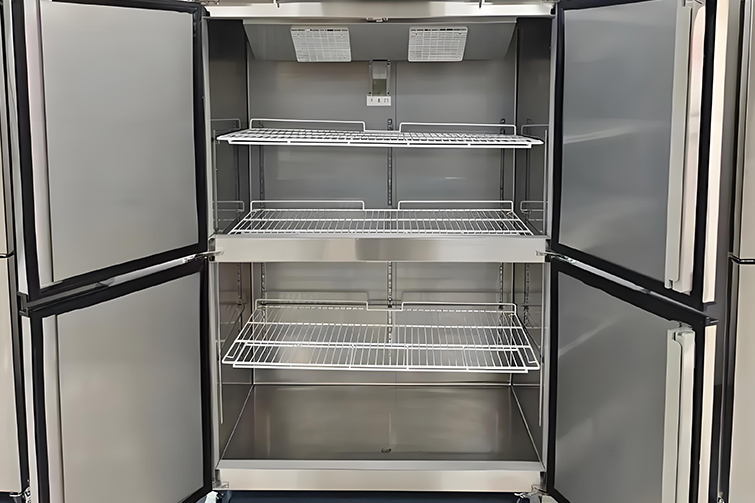
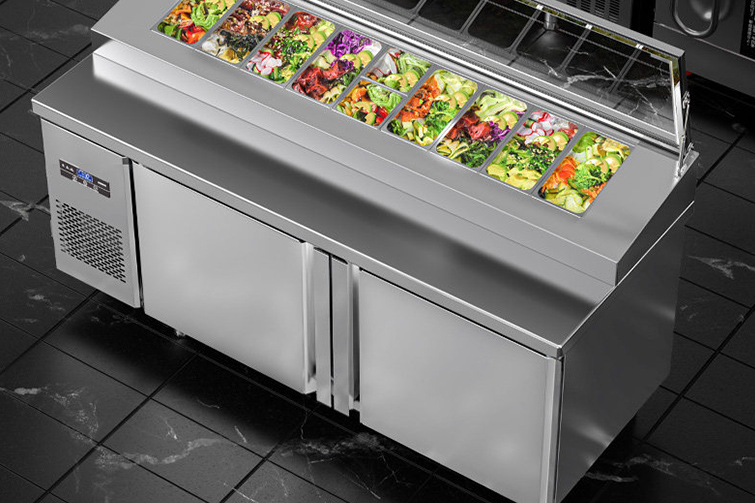
- Work Surface (The Critical Zone):Material: Stainless steel (SUS 304) is standard for durability and hygiene. Some models offer a marble or composite stone section for working dough, as it stays cool and provides the ideal texture.Size & Height: Standard depths are 24" or 30". Counter height is typically 34"-36" but ensure it's comfortable for your staff. Ample overhang provides knee space.Backsplash: A full stainless steel backsplash prevents wall splatter and is easy to clean.
- Refrigerated Ingredient Wells (The Heart of Freshness):Number & Size: Ranges from 3 to 12+ wells. Standard well sizes are 1/3, 1/2, or full-size gastronorm pans (e.g., GN 1/3). Choose a mix that fits your topping volume.Temperature Control: Look for a powerful, consistent refrigeration system that maintains wells at 34-38°F (1-3°C). Each well should have its own adjustable cold control for items like cheese vs. vegetables.Drainage: Each well must have a removable drain plug for easy cleaning and melting ice water removal.Lids: Clear acrylic or stainless steel lids help retain cold air and protect ingredients during off-peak hours.
- Storage & Utilities:Under-Table Storage: Often includes dry storage shelves for dough boxes, sauce containers, or packaging.Utility Rails: Side or back rails for holding portion scales, ticket holders, or utensil hooks keep the workspace organized.Sauce Dispensers: Some models have built-in refrigerated sauce wells with pump dispensers for speed and consistency.
3. Prioritize Hygiene, Safety, and Build Quality
- Construction: The entire unit should be built with heavy-duty, commercial-grade stainless steel. Welds should be smooth and seams sealed.
- Hygienic Design: Look for rounded corners, easy-to-clean surfaces, and removable well inserts. NSF/CE certification is a major plus for compliance.
- Stability & Mobility: Units should be incredibly sturdy. Heavy-duty, lockable casters are essential for flexible kitchen cleaning and layout changes.
- Safety Features: Ensure all electrical components (for refrigeration) are properly shielded and meet local codes. Non-slip foot pads are important.
4. Evaluate Refrigeration Performance and Energy Efficiency
- Cooling System: Self-contained, hermetically sealed compressor systems are more reliable and powerful than less expensive thermoelectric units. They recover temperature quickly after the lid is opened.
- Insulation: High-density foam insulation in the walls of the wells maintains temperature efficiently, saving energy.
- Energy Rating: While not always labeled, choosing a reputable brand known for efficient systems reduces long-term operating costs.
5. Consider Workflow Enhancements and Ergonomics
- "Mise en Place" Flow: The station should facilitate a logical workflow: dough > sauce > cheese > meats > vegetables > finishing area. Arrange wells accordingly.
- Lighting: An integrated overhead LED light illuminates the work surface, ensuring accuracy and presentation quality.
- Accessibility: All ingredients, tools, and dough should be within easy reach of the pizzaiolo without excessive bending or stretching.
6. Calculate Total Cost of Ownership
- Initial Investment: Prices vary greatly based on size, features, and brand. Set a realistic budget.
- Operational Costs: Factor in energy consumption and potential water usage for cleaning. A well-insulated, efficient unit saves money.
- Durability & Warranty: This is a long-term investment. Choose a manufacturer with a solid reputation and a strong warranty (e.g., 2-5 years on the compressor, 1 year on parts/labor). Local service availability is crucial.
Decision Checklist:
- Size & Wells: The surface area and number/size of refrigerated wells match my peak volume and menu.
- Temperature Control: The unit has a powerful, reliable compressor with individual well temperature control.
- Build Quality: Constructed from commercial-grade stainless steel with a hygienic, easy-to-clean design.
- Workflow: The layout promotes an efficient, logical assembly line for my staff.
- Utilities: It has the necessary storage, rails, and optional features (like a dough docker or marble section) I require.
- Mobility & Stability: It has sturdy, lockable casters and is stable during use.
- Warranty & Support: The manufacturer offers a strong warranty and accessible service.
By thoroughly assessing your needs against these criteria—focusing on ergonomic workflow, precise temperature control for ingredients, and industrial-grade durability—you will invest in a pizza prep station that enhances quality, boosts speed, and serves as the reliable core of your pizzeria for years to come.